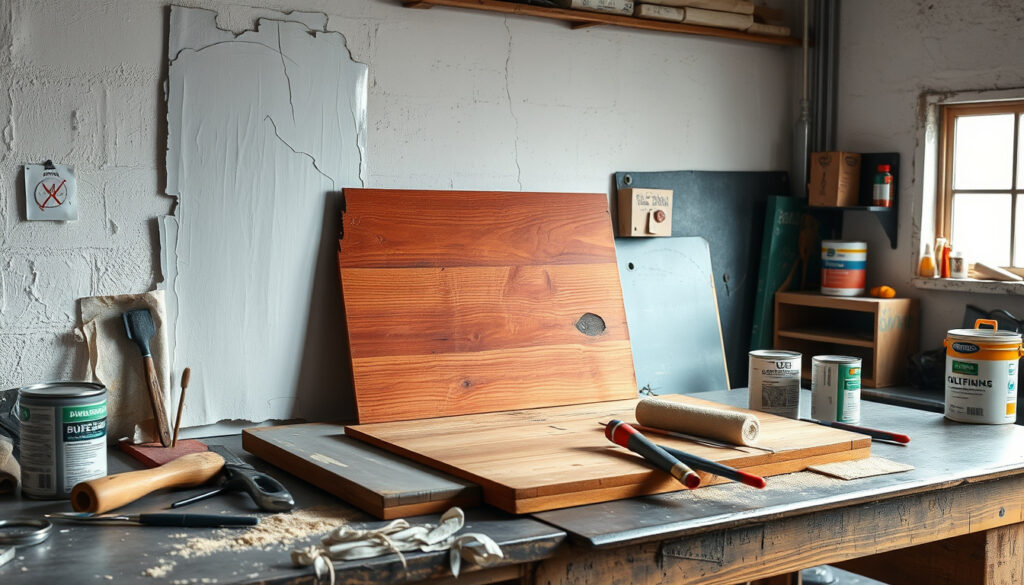
How to Repair Chipped Paint on Walls, Cars, Wood and Metal
Moving out of a rental and spotting a fist-sized chip in the hallway paint is a special kind of dread. The landlord’s inspection is in three days. You can’t repaint the whole wall, and you definitely can’t sand lead paint in a home built before 1978. But here’s what most people miss: you don’t have to. A Home Depot guide on paint chip repair shows that spackle and a plastic putty knife can handle most small-to-medium chips in under an hour, without sanding, without trace. This guide covers walls, cars, wood, and metal—renter-safe, primer-first, no-sanding methods that actually work.
Common tools: putty knife, sandpaper, spackle · Best for small chips: spackle or patching compound · Prep step 1: scrape loose paint · Car repair needs: touch-up kit with primer · Rental fix tip: sample size paint
Quick snapshot
- Scrape loose paint before filling (Home Depot)
- Spackle works for interior wall chips up to 3–4 inches deep (Lowe’s)
- Plastic putty knife avoids scratching delicate surfaces (Dwell)
- Wood filler instead of spackle for wooden surfaces (Home Depot)
- WD-40 long-term paint restoration effectiveness
- Which paint color is hardest to blend over existing chips
- Long-term durability comparison between spackle vs. wood filler on high-traffic surfaces
- Choose surface type below to match your repair
- Renters: prioritize no-trace methods before move-out
- Car owners: consider professional detailer for deep chips
The table below consolidates key facts across repair methods and surfaces to help you match the right approach to your specific situation.
| Parameter | Value | Source |
|---|---|---|
| First step | Scrape loose paint | Home Depot |
| Small chip filler | Spackle | Home Depot |
| Car tool | Touch-up kit | YouTube |
| Sand grit | 200+ | The Craftsman Blog |
| Spackle depth limit | 3–4 inches | Lowe’s |
| Lead paint threshold | Homes built before 1978 | Home Depot |
| Wood filler dry time | Few hours | Lowe’s |
| Spackle full cure | 24 hours | Home Depot |
How to Fix Paint Chips on a Wall
Wall chips are the most common repair—and for renters, the most fraught. You’re not just fixing paint; you’re navigating a space that isn’t technically yours. The good news: most chips under 3–4 inches in diameter can disappear completely with spackle and a few minutes of feathering work.
Prep the area
- Move furniture 2–3 feet away from the wall and cover with sheets
- Apply painter’s tape along trim, baseboards, and any adjoining surfaces
- Identify if your building was built before 1978 (see lead paint warning below)
Homes built before 1978 may contain lead-based paint. Never sand or scrape aggressively in such homes—hire a certified lead abatement professional. Home Depot’s guide explicitly states: never remove lead paint yourself.
Remove loose paint
- Hold a plastic putty knife at a 15–20° angle and scrape back to solid paint
- A wire brush removes smaller loose pieces after scraping
- Work outward from the chip’s center to avoid creating new chips
A plastic putty knife prevents scratching on delicate surfaces like eggshell or satin finishes—metal knives leave visible marks on soft paints, according to Dwell’s rental repair guide.
Sand edges
- Use 200-grit sandpaper to bevel the chip edges inward
- Feather the transition zone 2–3 inches beyond the chip boundary
- Clean dust with vacuum then damp sponge before applying filler
Apply spackle
- Use a 4-inch putty knife to spread spackle in thin layers
- Overfill slightly—the compound shrinks slightly as it dries
- Let dry 45–60 minutes minimum; full cure in 24 hours before painting
Spackle’s depth limit is 3–4 inches, per Lowe’s material guide. Larger gouges need drywall patching compound or a professional patch—spackle alone won’t hold.
Feather and paint
- After drying, sand lightly with 200+ grit to level the patch
- Apply primer to seal moisture and improve paint adhesion
- Feather primer and paint outward from the patch center to blend
- Match your original applicator—roller for textured walls, brush for smooth
For textured walls, apply texture spray after priming, let rest 5 minutes until semi-dry, then pat down with a sponge. Full texture dry takes 2–5 hours before painting.
How to Repair Chipped Paint on Car
Car paint chips are different. They’re usually caused by rock strikes, and the underlying metal rusts fast if left exposed. The repair goal isn’t invisible blending—it’s preventing corrosion until you can get to a detailer or a full respray.
Clean and sand chip
- Wash the area with soap and water, then wipe with isopropyl alcohol
- Use fine sandpaper (400–600 grit) around the chip edges only—don’t sand the bare metal if possible
- Blow away dust and let the surface dry completely
Aggressive sanding opens up more surface area for rust to form. The Dr. ColorChip method demonstrated on YouTube shows that touch-up paint can fill small rock chips without any sanding at all—reducing surface prep time to just cleaning.
Apply primer
- Only if bare metal is visible: apply a rust-inhibiting primer with a fine brush
- Let primer dry per product instructions (typically 15–30 minutes)
- Mask surrounding areas with painter’s tape to protect undamaged finish
Use touch-up paint
- Shake the touch-up bottle and apply a thin first coat with the included brush
- Let each coat dry 15–20 minutes between applications
- Build up 2–3 thin layers rather than one thick layer (thick layers sag and crack)
DIY touch-up paint works for rock chips under 5mm. For larger chips or deep scratches that expose primer, a professional detailer’s spray system produces results that no brush can match—but costs $200–$500 depending on panel size, per industry estimates.
Polish finish
- Once fully cured (24–48 hours), wet-sand with 2000–3000 grit compound
- Polish with a dual-action polisher or hand buffer using finishing compound
- Apply car wax to restore shine and protect the repair
“For small paint touch-ups, one method that worked well for me is to apply the paint with a brush, then roll a dry roller over it to blend without a full repaint.”
— DIY repair video creator
How to Repair Chipped Paint on Wood
Wood surfaces—trim, doors, furniture, baseboards—absorb filler differently than drywall. Spackle works for walls but not wood: you need wood filler or wood putty, which bonds to the grain rather than filling a porous surface.
Scrape loose paint
- Use a plastic putty knife at a shallow angle to avoid gouging the wood grain
- Remove all flaking paint back to solid, adhered coating
- Work along the wood grain direction—scraping against grain creates scratches
Sand smooth
- Start with 120-grit to level the chip edge, then finish with 200-grit
- Sand with the grain only; cross-grain scratches show through paint
- Wipe with a tack cloth to remove all dust before filling
Lowe’s material guide notes that wood putty fills chips on wooden doors, furniture, and trim for both interior and exterior use—but it’s not designed to be sanded flush like spackle. For deep chips, apply in layers and let each cure fully.
Fill with wood filler
- Press wood filler into the chip with a plastic putty knife
- Overfill slightly—wood filler shrinks slightly during curing
- Let dry 2–4 hours depending on product and chip depth
Prime and paint
- Sand cured filler smooth with 200-grit
- Apply wood primer to seal the filler and improve paint adhesion
- Feather paint outward from the repair center to blend with surrounding finish
“Spackle is easier to handle for smaller chips. It dries quickly and sands down smooth.”
How to Repair Chipped Paint on Metal
Metal surfaces—fencing, railings, appliances, gutters—chip differently than walls or wood. The primary concern isn’t cosmetic: it’s rust. Every exposed metal chip is a corrosion starting point that spreads under the paint if left untreated.
Remove rust if present
- Apply rust converter or naval jelly to affected areas per product instructions
- Scrub with a wire brush to remove loosened rust particles
- Rinse and let dry completely—moisture trapped under filler causes failure
Rust spreads beneath paint even in dry conditions. Once corrosion starts, it lifts the paint edge and creates a larger repair area. Home Depot’s repair guide emphasizes sealing moisture with primer after every metal repair.
Sand edges
- Use 200–400 grit sandpaper to bevel paint edges inward from the chip
- Create a smooth transition zone 1–2 inches beyond the chip boundary
- Clean surface with alcohol or degreaser to remove oils that prevent adhesion
Apply metal primer
- Use a rust-inhibiting primer designed for bare metal surfaces
- Apply thin coat, let dry 15–30 minutes before topcoat
- Primer must fully cover exposed metal—any gap becomes a future rust site
Touch up paint
- Match original paint type (enamel, acrylic, lacquer) if possible
- Apply 2–3 thin coats rather than one thick coat
- Feather each coat outward 1–2 inches beyond the previous
The pattern across all metal repairs is consistent: rust removal precedes any filling, and primer is non-negotiable on bare metal to prevent repeat failures within a year.
Can I Just Paint Over a Paint Chip?
The short answer: no—not if you want the repair to last. Paint applied directly over a chip without prep will peel within months, especially on high-touch or exterior surfaces. But there are legitimate shortcuts that minimize prep without skipping it entirely.
Risks of skipping prep
- Paint won’t adhere to bare wood, metal, or drywall without primer
- Uneven surface causes visible texture differences under light
- Chip edges remain sharp and catch light, making repairs obvious
- Moisture intrusion through gaps causes mold and further damage
In homes built before 1978, any paint chip larger than a thumbnail warrants a lead test before you sand, scrape, or apply any filler. Contact an EPA-certified lead inspector. Home Depot’s guide is explicit: never remove lead paint yourself.
Quick fixes without sanding
- Feathering technique: use a 4-inch putty knife to blend spackle edges without sandpaper
- Ready Patch compound: designed to fill and blend without heavy sanding (The Craftsman Blog)
- Paint-with-roller blend: apply paint with brush, then roll dry roller to diffuse edges
WD-40 myths
WD-40 is often cited as a paint restoration miracle. The reality is more limited. Home Depot’s guide notes no evidence that WD-40 restores paint adhesion or fills chips. It can clean surface grime and temporarily protect bare metal from rust—but it doesn’t rebuild paint layers or bond to existing coatings.
WD-40 is safe on intact paint and useful for cleaning and rust prevention on bare metal. It is not a paint repair product. For faded or chipped paint, primer and touch-up paint will always outperform any lubricant-based shortcut.
“Never remove lead paint by yourself. It can be hazardous to your health.”
— Home Depot repair guide
Confirmed vs. Unclear
Distinguishing between what repair methods guarantee and what remains uncertain helps you prioritize your approach and set realistic expectations for each surface type.
Confirmed facts
- Scrape loose paint before filling (Home Depot, Lowe’s)
- Spackle works for interior walls, depth limit 3–4 inches (Lowe’s)
- Wood filler instead of spackle for wooden surfaces (Home Depot)
- Plastic putty knife prevents scratching on delicate finishes (Dwell)
- Primer seals moisture and improves paint adhesion (Home Depot)
- Lead paint hazard requires professional abatement in pre-1978 homes (Home Depot)
Unclear / unverified
- WD-40 long-term paint restoration effectiveness
- Which paint color is objectively hardest to blend over chips
- Long-term durability comparison: spackle vs. wood filler vs. Ready Patch
- Specific no-sanding methods for non-car metal surfaces beyond basics
For automotive surfaces where chips expose metal, professional car paint shops near me can handle everything from touch-ups to full resprays efficiently.
Frequently asked questions
Is there a way to fix chipped paint?
Yes. For walls, scrape loose paint, apply spackle in thin layers, let dry 24 hours, sand lightly, prime, and paint. For wood, use wood filler instead of spackle. For metal, remove rust first, apply primer, then paint. The method depends on your surface type and whether you’re in a rental with no-trace requirements.
Can WD-40 restore paint?
No. WD-40 cleans surface grime and protects bare metal from rust temporarily, but it does not restore paint adhesion or fill chips. For chipped paint repair, use spackle or filler with primer and paint.
How do detailers fix paint chips?
Professional auto detailers use spray systems and precision color matching to fill rock chips with results that brush application cannot match. For DIY, a touch-up kit with fine brush application builds up 2–3 thin coats. Professional repair typically costs $200–$500 per panel.
What is the hardest color to paint over?
Bright reds, deep yellows, and saturated greens are typically hardest to blend because they require precise color matching and multiple coats to avoid show-through. Neutral whites and beiges are easiest to touch up with minimal color drift.
Is WD-40 safe to use on paint?
Yes, WD-40 is safe on intact paint surfaces and will not damage the finish. It is useful for cleaning and temporarily preventing rust on exposed metal. However, it does not repair paint and should not be relied upon as a touch-up solution.
Can I fix paint ripped off wall without paint?
You can fill the gouge without repainting the entire wall. Apply spackle to the bare area, feather edges with a wide putty knife, let dry, sand lightly, prime, then apply paint only to the repaired spot. Blend by rolling a dry roller over the wet paint edges.
How to fix chipped paint on door?
Determine if the door is wood or metal. For wood doors, scrape loose paint, sand with the grain, apply wood filler, let cure, prime, and paint. For metal doors, remove rust first, apply metal primer, then paint. Use plastic putty knife on both to avoid scratching the surface.
For renters facing move-out inspections, the math is simple: one afternoon of spackle work beats a damage deduction. For car owners, a $30 touch-up kit extends the life of your paint until a full respray becomes feasible. For wood and metal surfaces, filler plus primer is non-negotiable—skip the primer and you’ll be reparing the same chip within a year.
More related posts
 Who Called Me Ireland? Free Reverse Phone Lookup & Scam Alerts
 9.5 Stone in kg – Exactly How Many Kilograms
 Semenyo Next Club Odds – Betting Markets and City Transfer
 Staycity Aparthotels Dublin City Centre: Booking & Reviews
 World Darts Championship 2026: Schedule, Results & Prize Money
 Santa Claus: The Movie (1985) – Where to Watch, Cast & Legacy
 Who Shot Charlie Kirk? Verified Facts & Latest Case Update
 Club Brugge vs Aston Villa Lineups: Starting XI & Match Result